Quick Start guide for Overleaf users
此内容尚不支持你的语言。
We built CiteDrive from the ground up with a relentless focus on simplicity— to be distraction-free and enable seamless reference management while staying out of your way. In less than 5 minutes, this quick start will walk you through every step of setting up a new project, collecting references, connecting your project to Overleaf and rendering a paper with bibliography and in-text citations.
Create a Project
Once you’ve signed up for a CiteDrive account, kick things off by creating your first project. CiteDrive is designed to support as many projects as you require, helping you keep your references and co-authors in order and focused on your next publication, book, or thesis. Choose the flavor that best suits where you ultimately plan to write and edit your paper.

For the sake of this quick start guide, go ahead and create one, giving it a name of your choice. You could opt for something like ‘My First Project’ or ‘Tutorial.‘
Add References with CiteDrive Companion
One of the fastest and easiest ways to collect references for your CiteDrive project is to install the CiteDrive Companion browser extension from the Chrome Web Store, Microsoft Edge Add-ons or Firefox Browser Add-ons. With CiteDrive Companion, you can search and browse papers, books and more through your favorite indexes such as Google Scholar, Pubmed and many others.
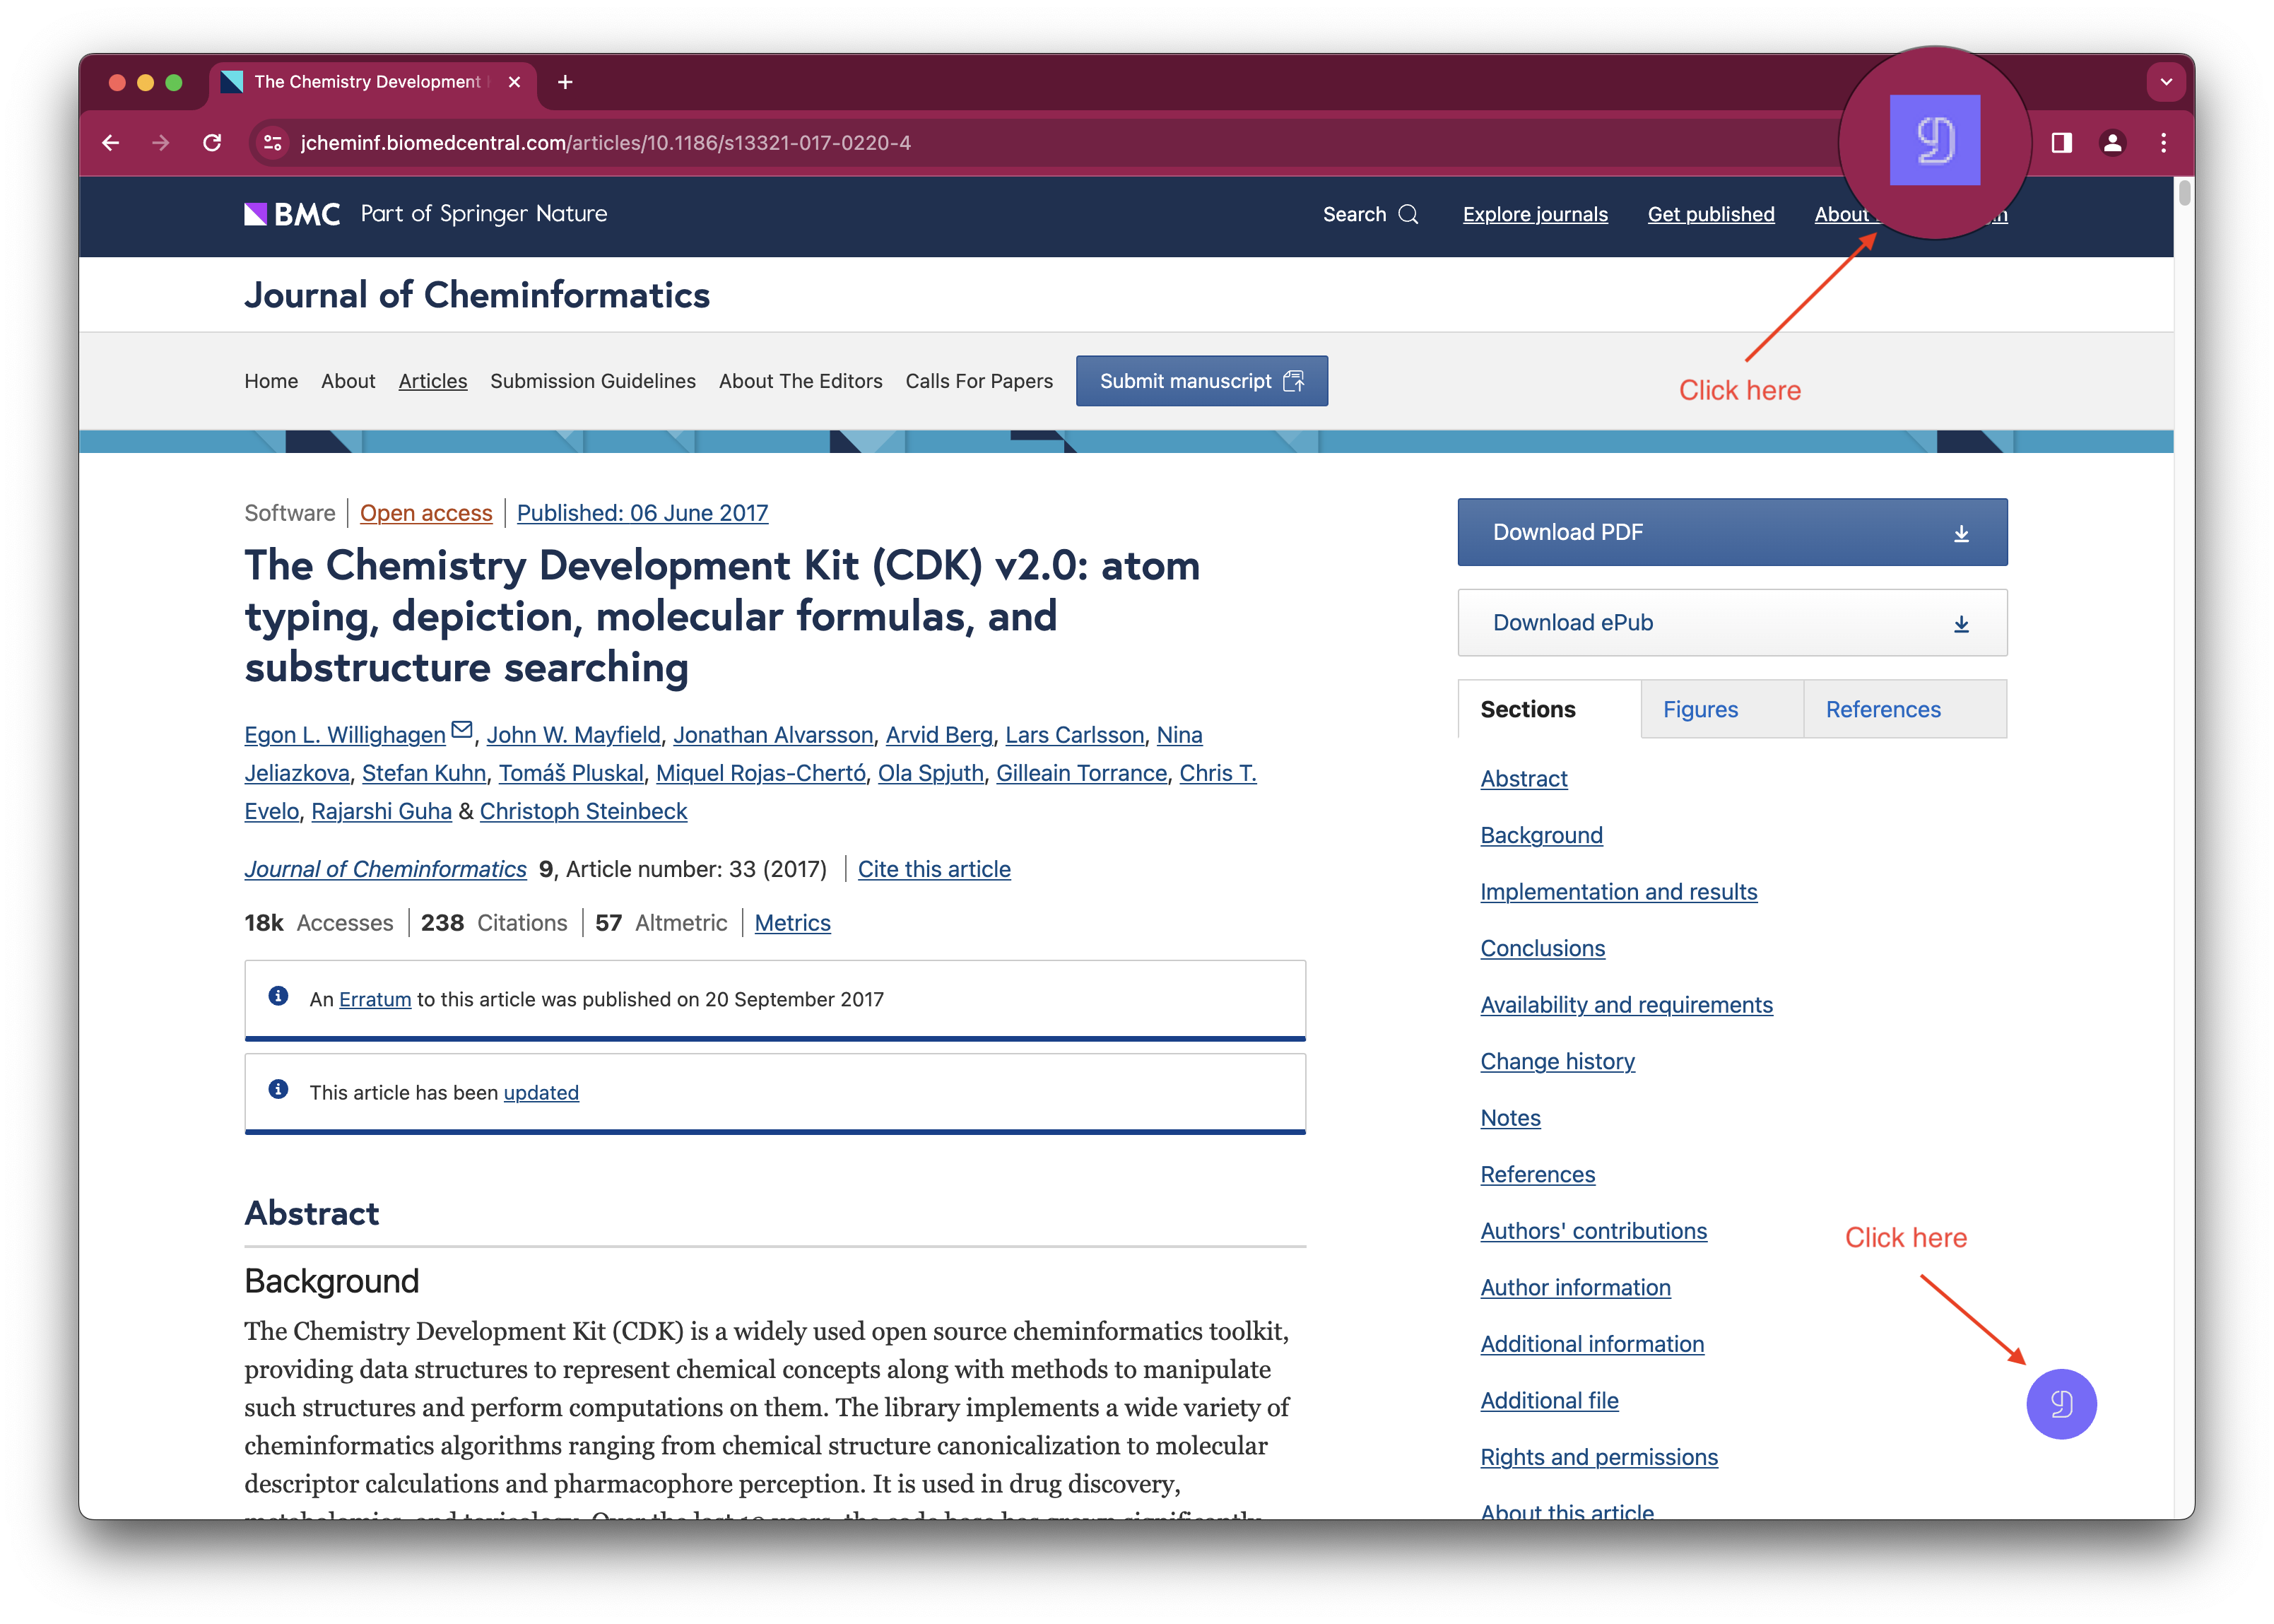
Install the CiteDrive Companion extension from one of the links above into your respective browser. Open a new tab and head to Google Scholar. Conduct a search on a topic, like ‘Chemistry Development Kit,’ and choose a paper that catches your eye. Whenever you come across references you want in your CiteDrive project, simply click the ‘CiteDrive’ button – either located in the upper right corner of your screen or on the floating button when viewing the paper directly:
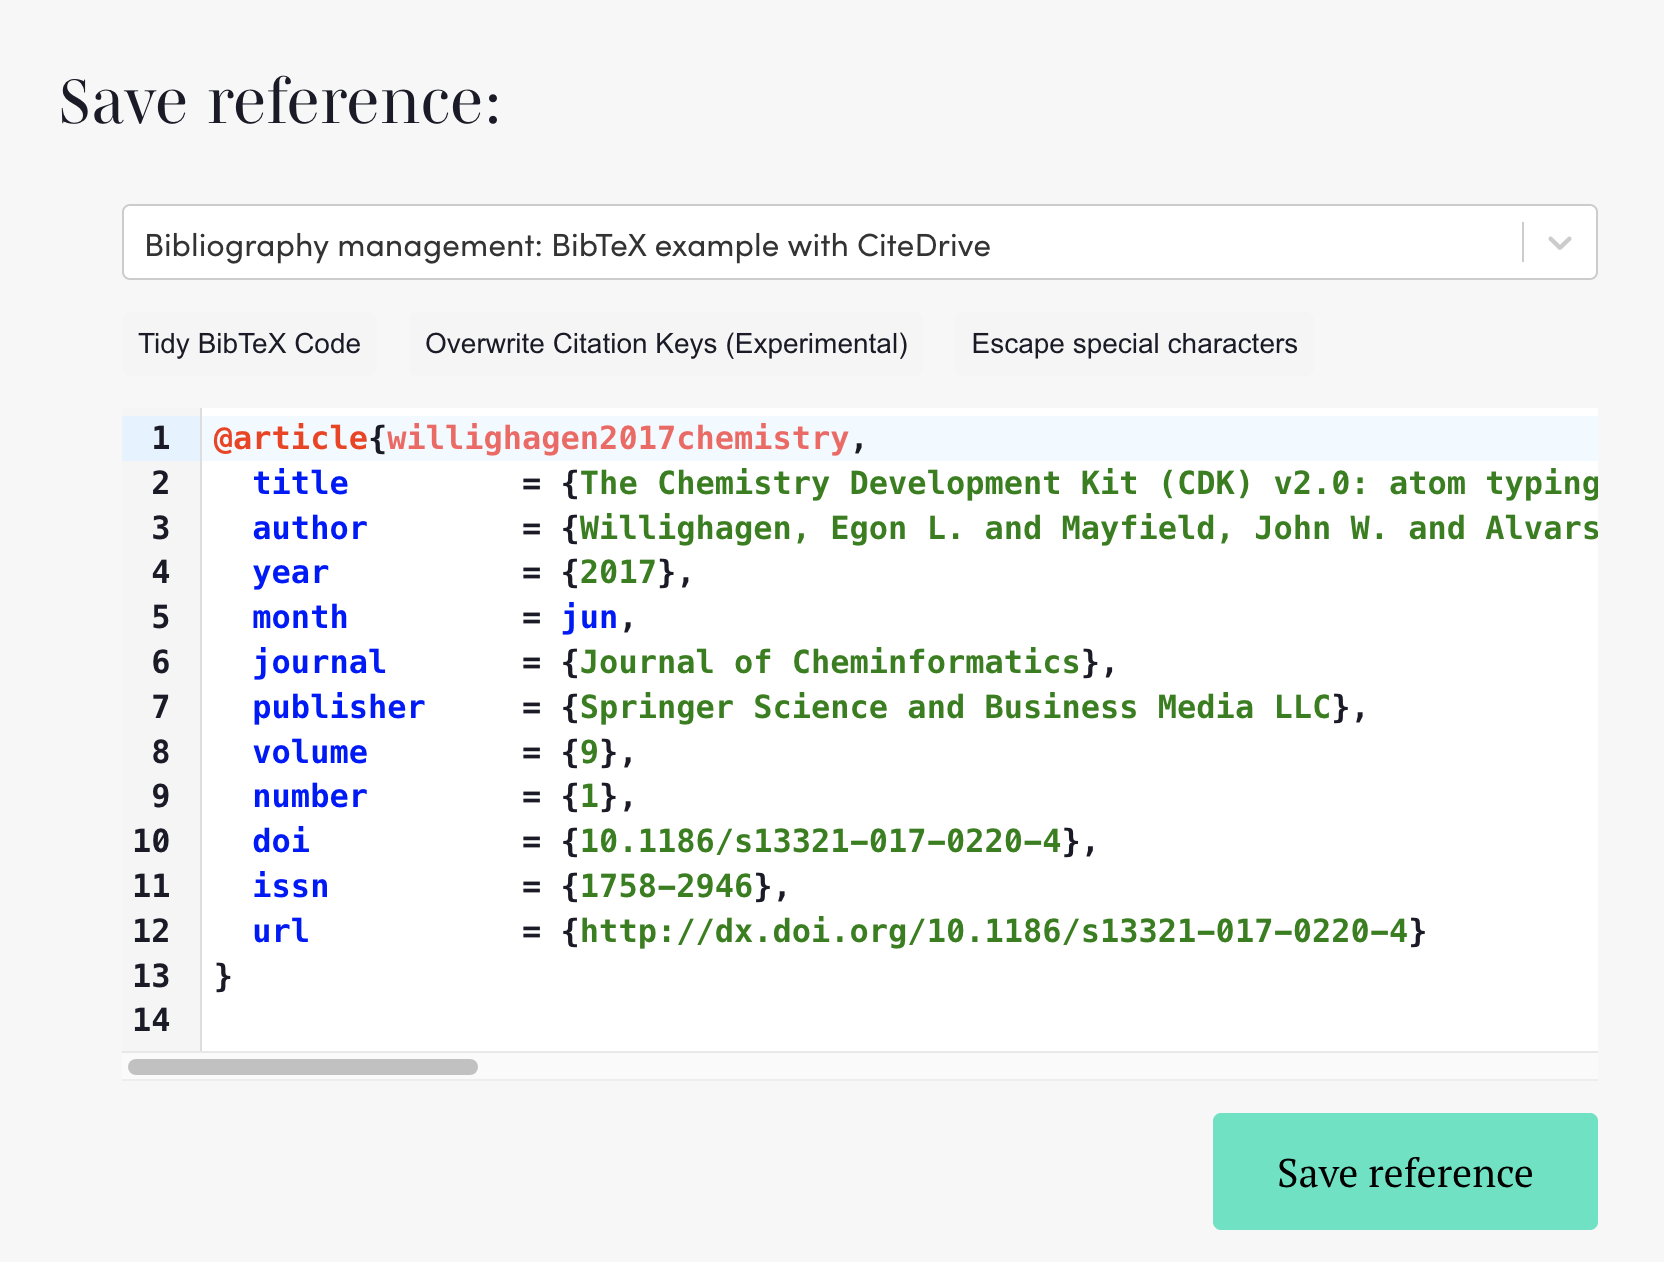
A new window will then pop up to confirm the project to which you’d like to add the reference, also displaying a preview of the BibTeX entry. You may edit it if there are any errors or if you want to add a note or keywords. Click Save Reference to confirm, and the reference will now be added to your project.
Link your project to Overleaf
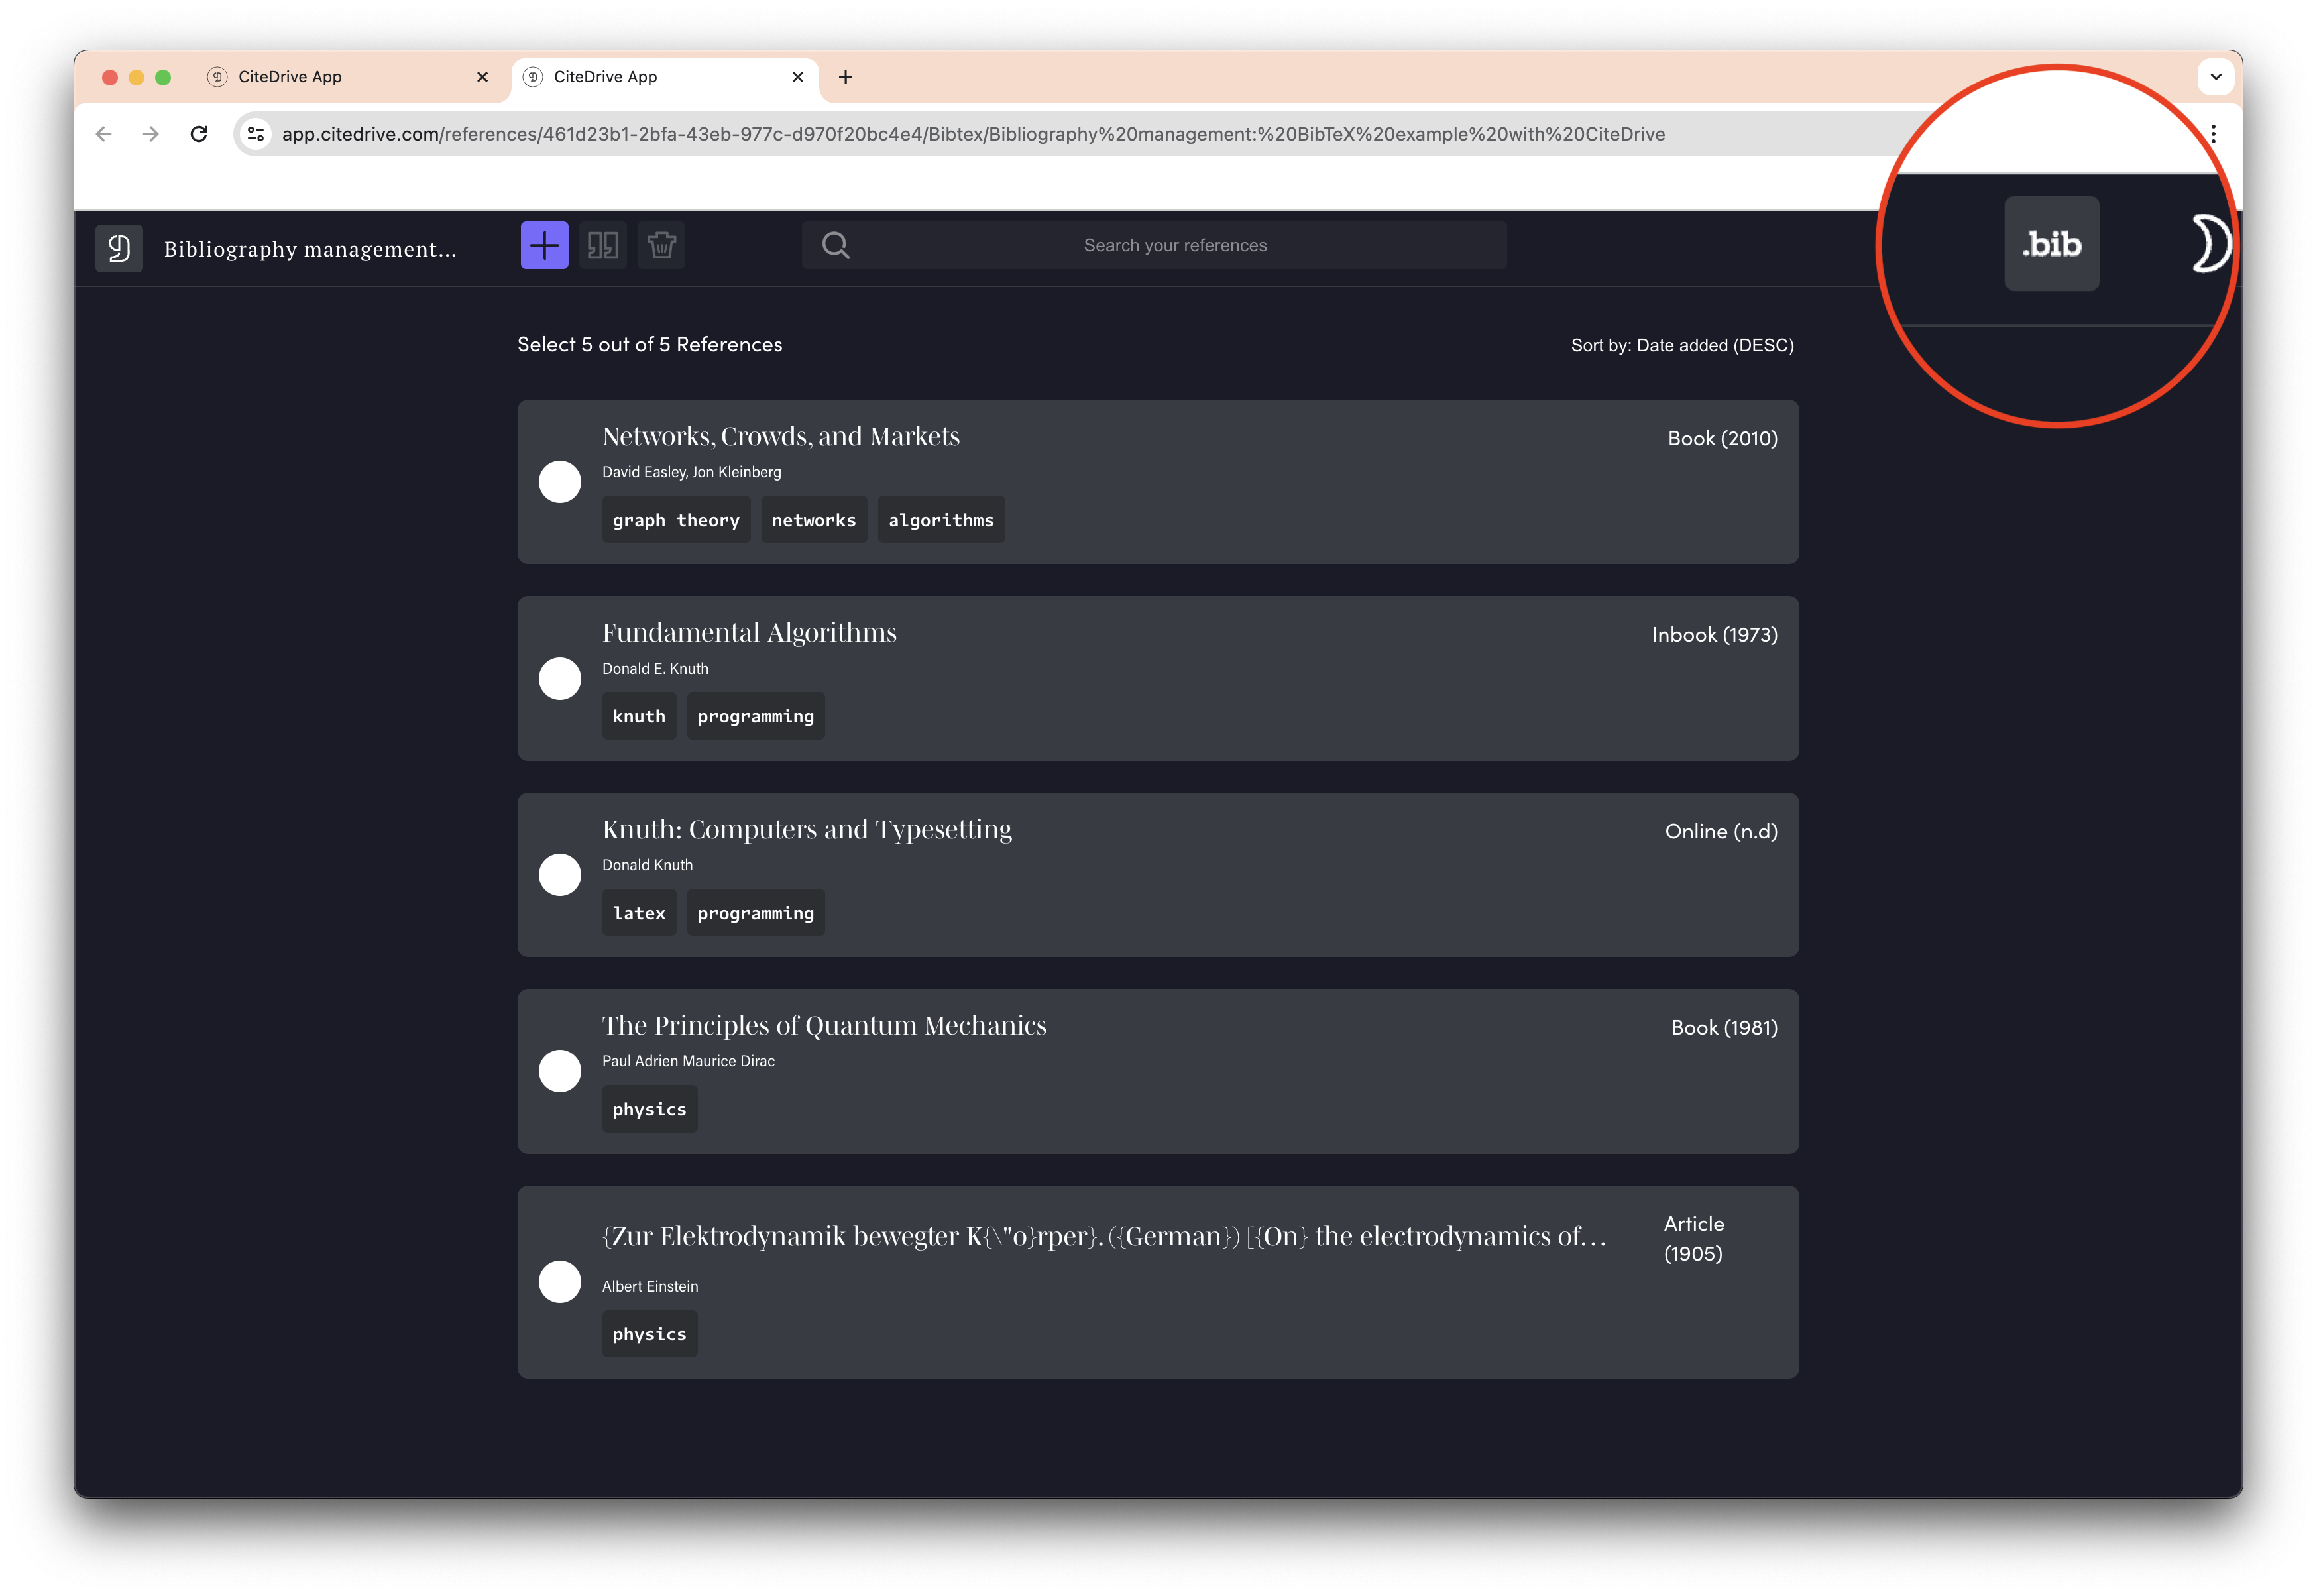
CiteDrive supports collaboration with various editors, but let’s swiftly guide you through linking your CiteDrive project with Overleaf. Begin by revisiting your project and clicking the .bib button located at the top right of the screen:
A new pop-up window will be opened to export your BibTeX file. You can see that you can download it for your offline editors. However, here, we will click on copy.

After that, return back to your Overleaf project. On the left-hand pane, click the upload button:
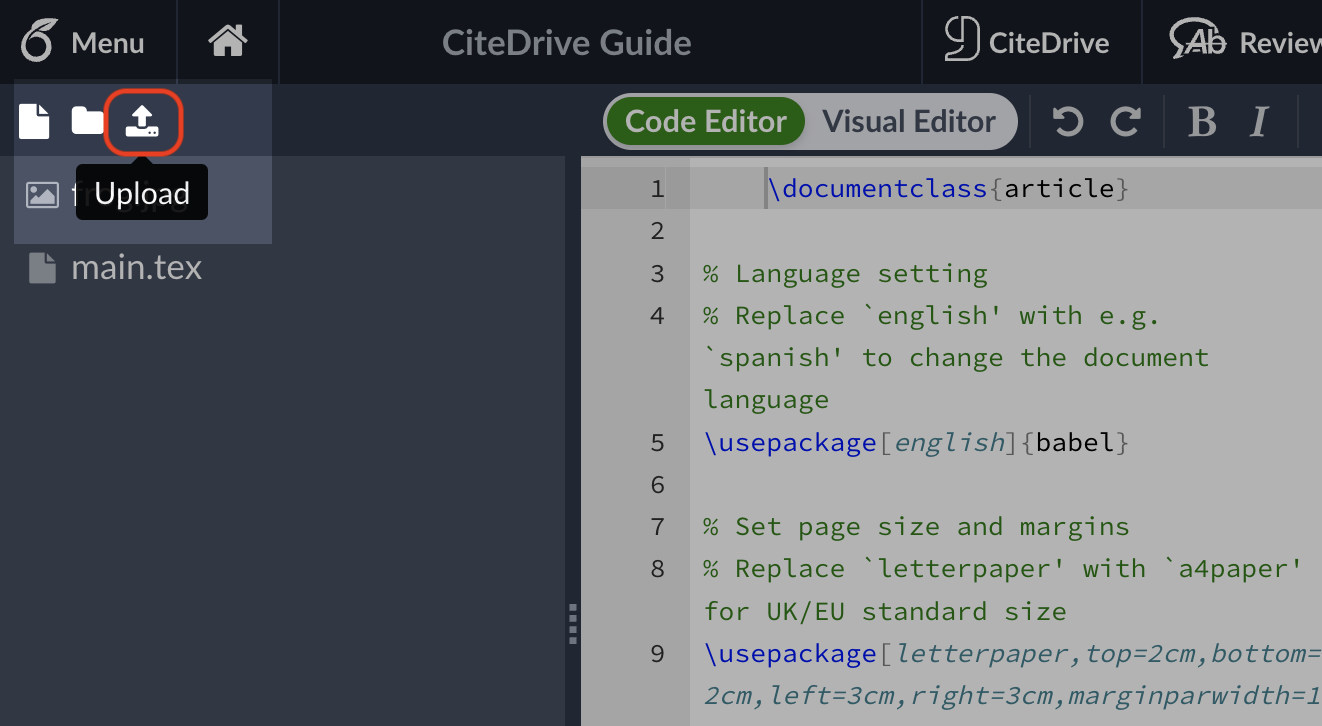
In the upload popup, select From External URL. Paste the URL from earlier in the top field. You will notice that the dynamic file will be automatically named bibliography.bib in the bottom field as shown below, but you can rename it if you wish:
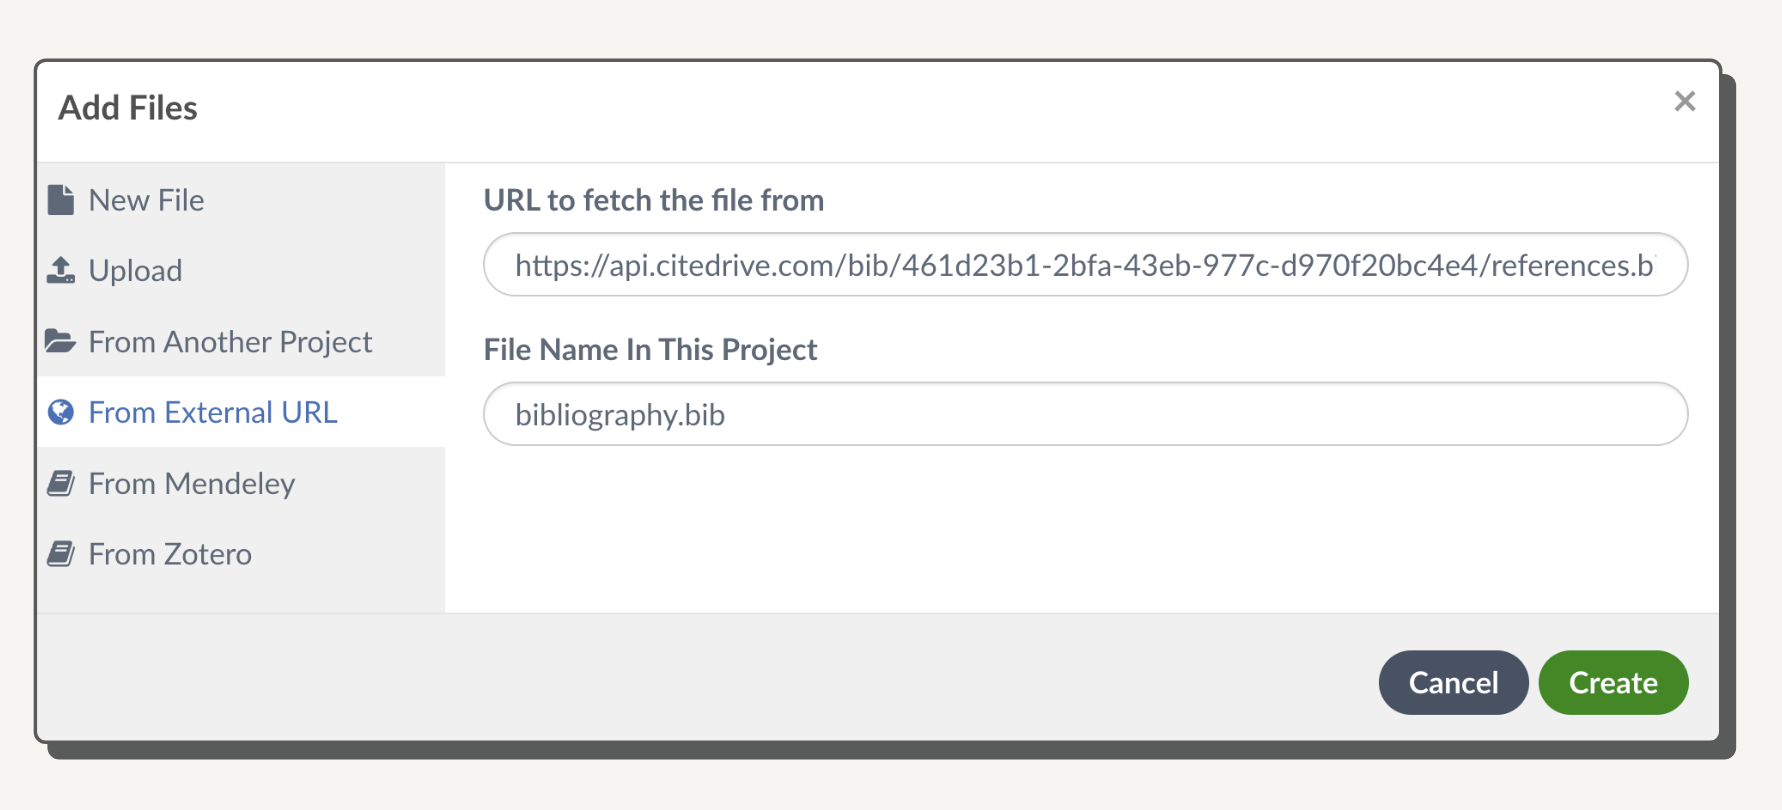
Click the Create button and note the new bibliography.bib (or other) file on the left-hand side of the screen.

Add a bibliography to your Overleaf project
Once you’ve linked your CiteDrive and Overleaf projects, we’ll next want to prepare our paper to include a bibliography. Open your main.tex file and add two tags near the top of the file.
\usepackage[utf8]{inputenc}\usepackage{apacite}Similarly, add two more tags near the end of the file but before the ending document tag:
\bibliographystyle{apacite}\bibliography{bibliography}You can also use the template below or open it directly in Overleaf:
\documentclass{article}\usepackage[utf8]{inputenc}\usepackage{apacite}
\title{Using CiteDrive BibTeX References in Overleaf}\author{John smith}\date{September 2024}
\begin{document}
\maketitle
\section{Introduction}
\section{Main}
\bibliographystyle{apacite}\bibliography{bibliography}
\end{document}
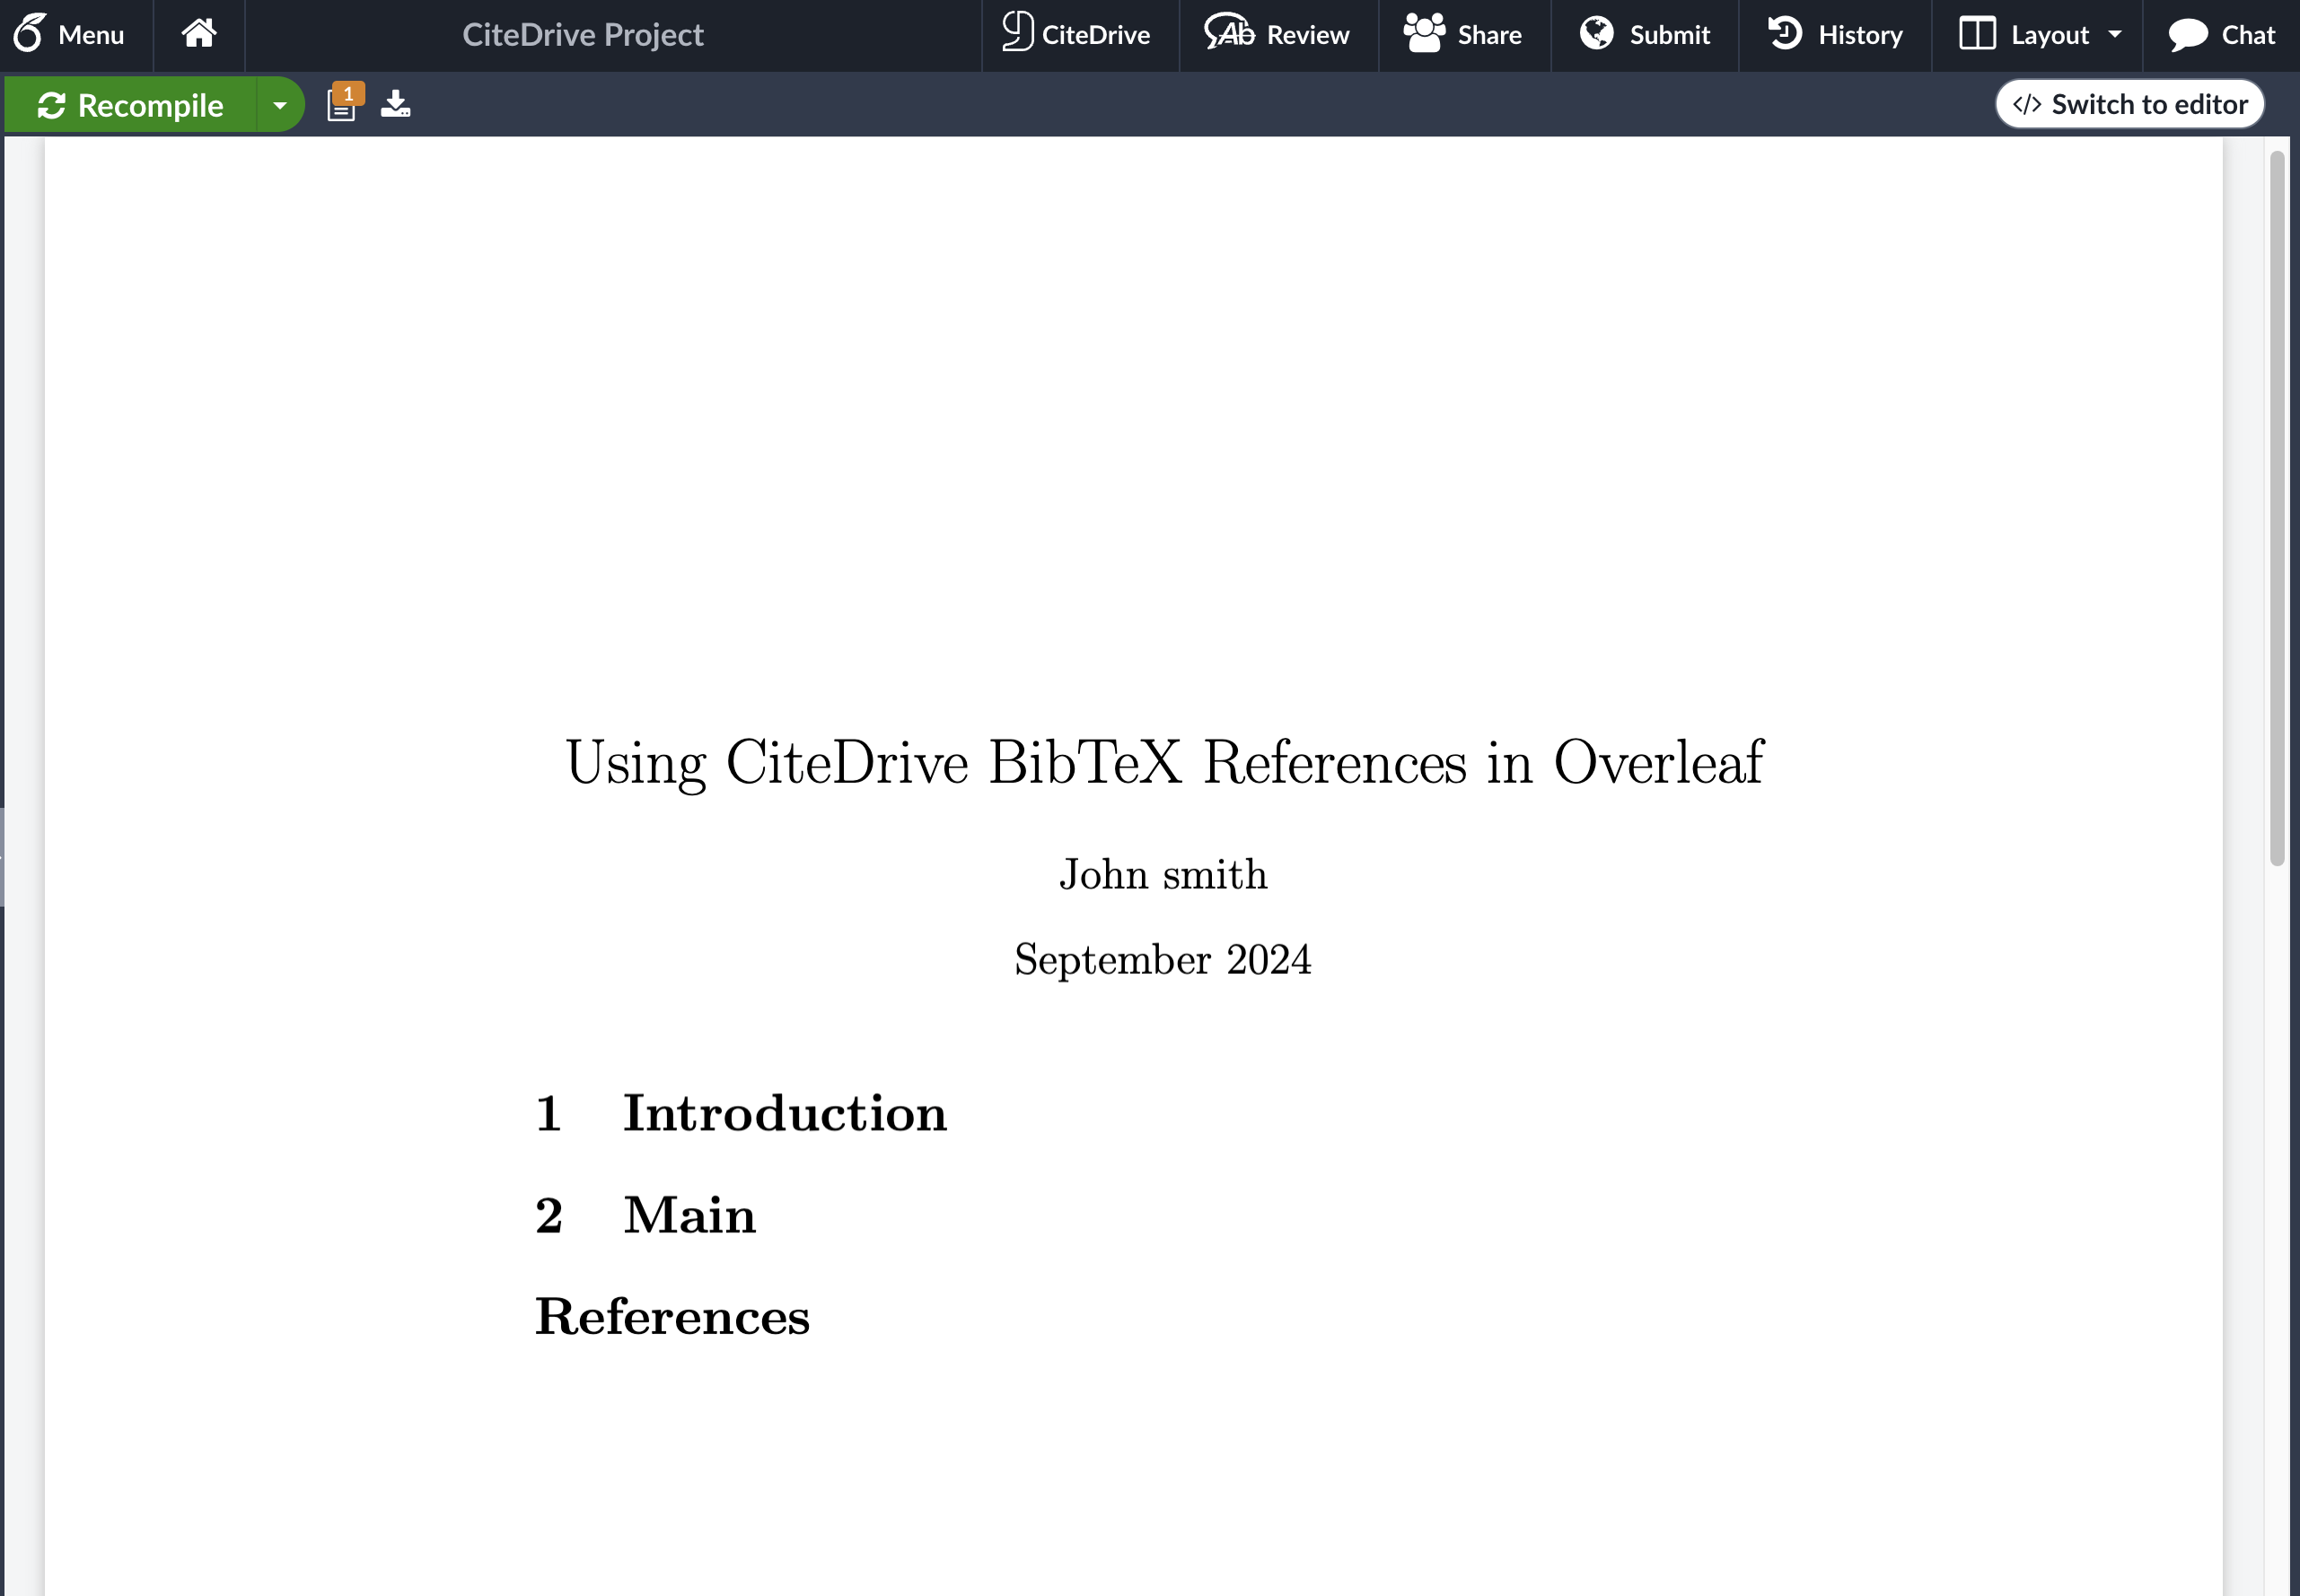
If you now re-render your paper, you should see an empty bibliography included:
Adding in-text citations to your paper
As the final step in our quick start, we’ll generate and add a couple in-text citations to our Overleaf project. Begin by drafting some text for a section of your paper:
...\section{Introduction}Recent studies suggest that [...] and much more....If you have installed the CiteDrive Companion, you will see a CiteDrive Button; click on it, and CiteDrive will open.
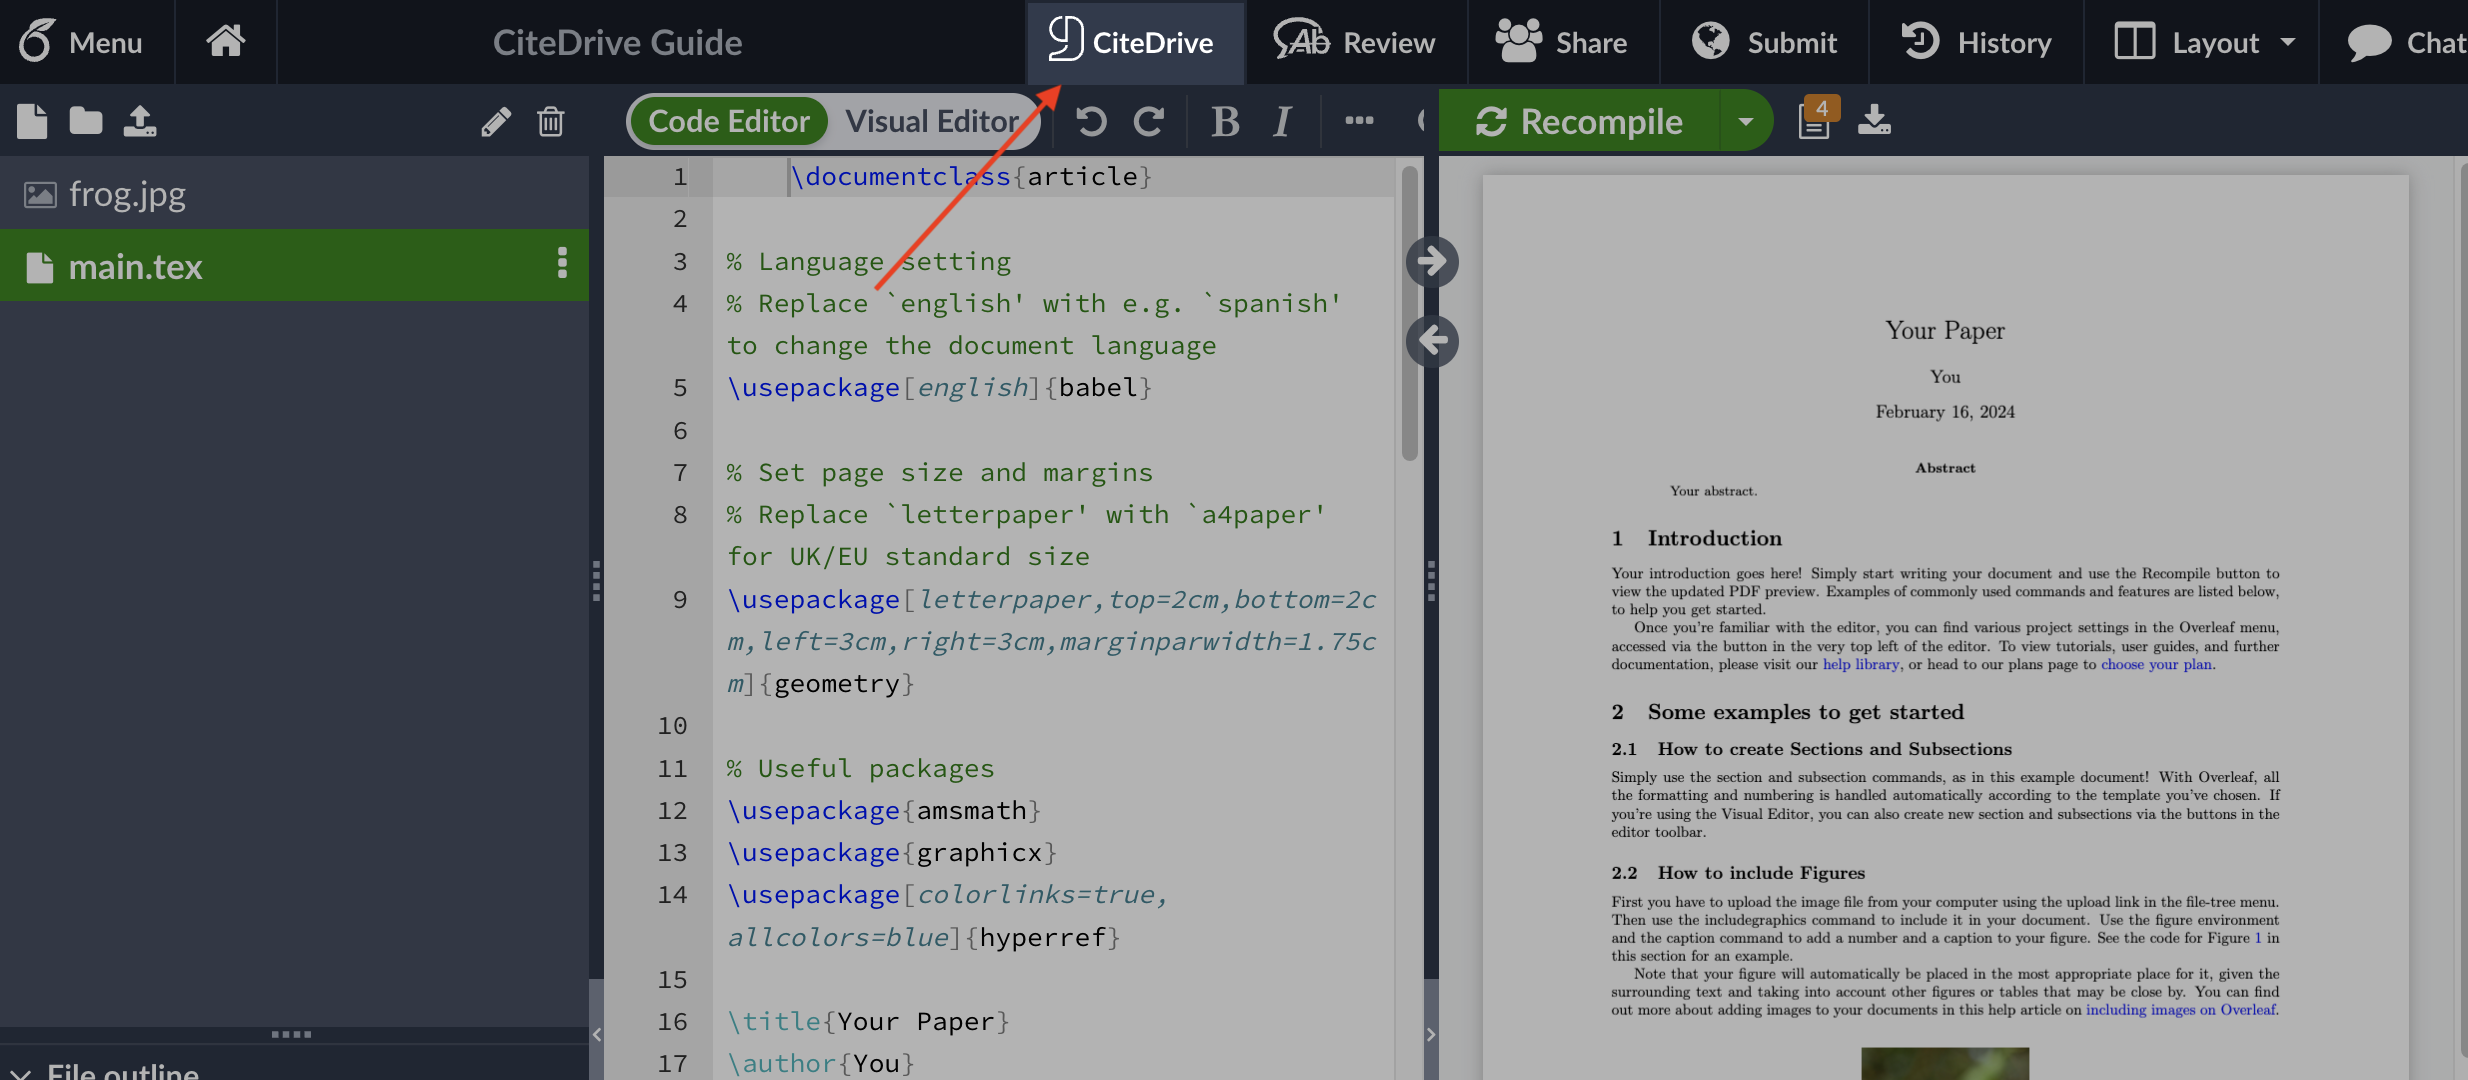
Choose your project and select a reference (or more) from your project, then click the cite button.
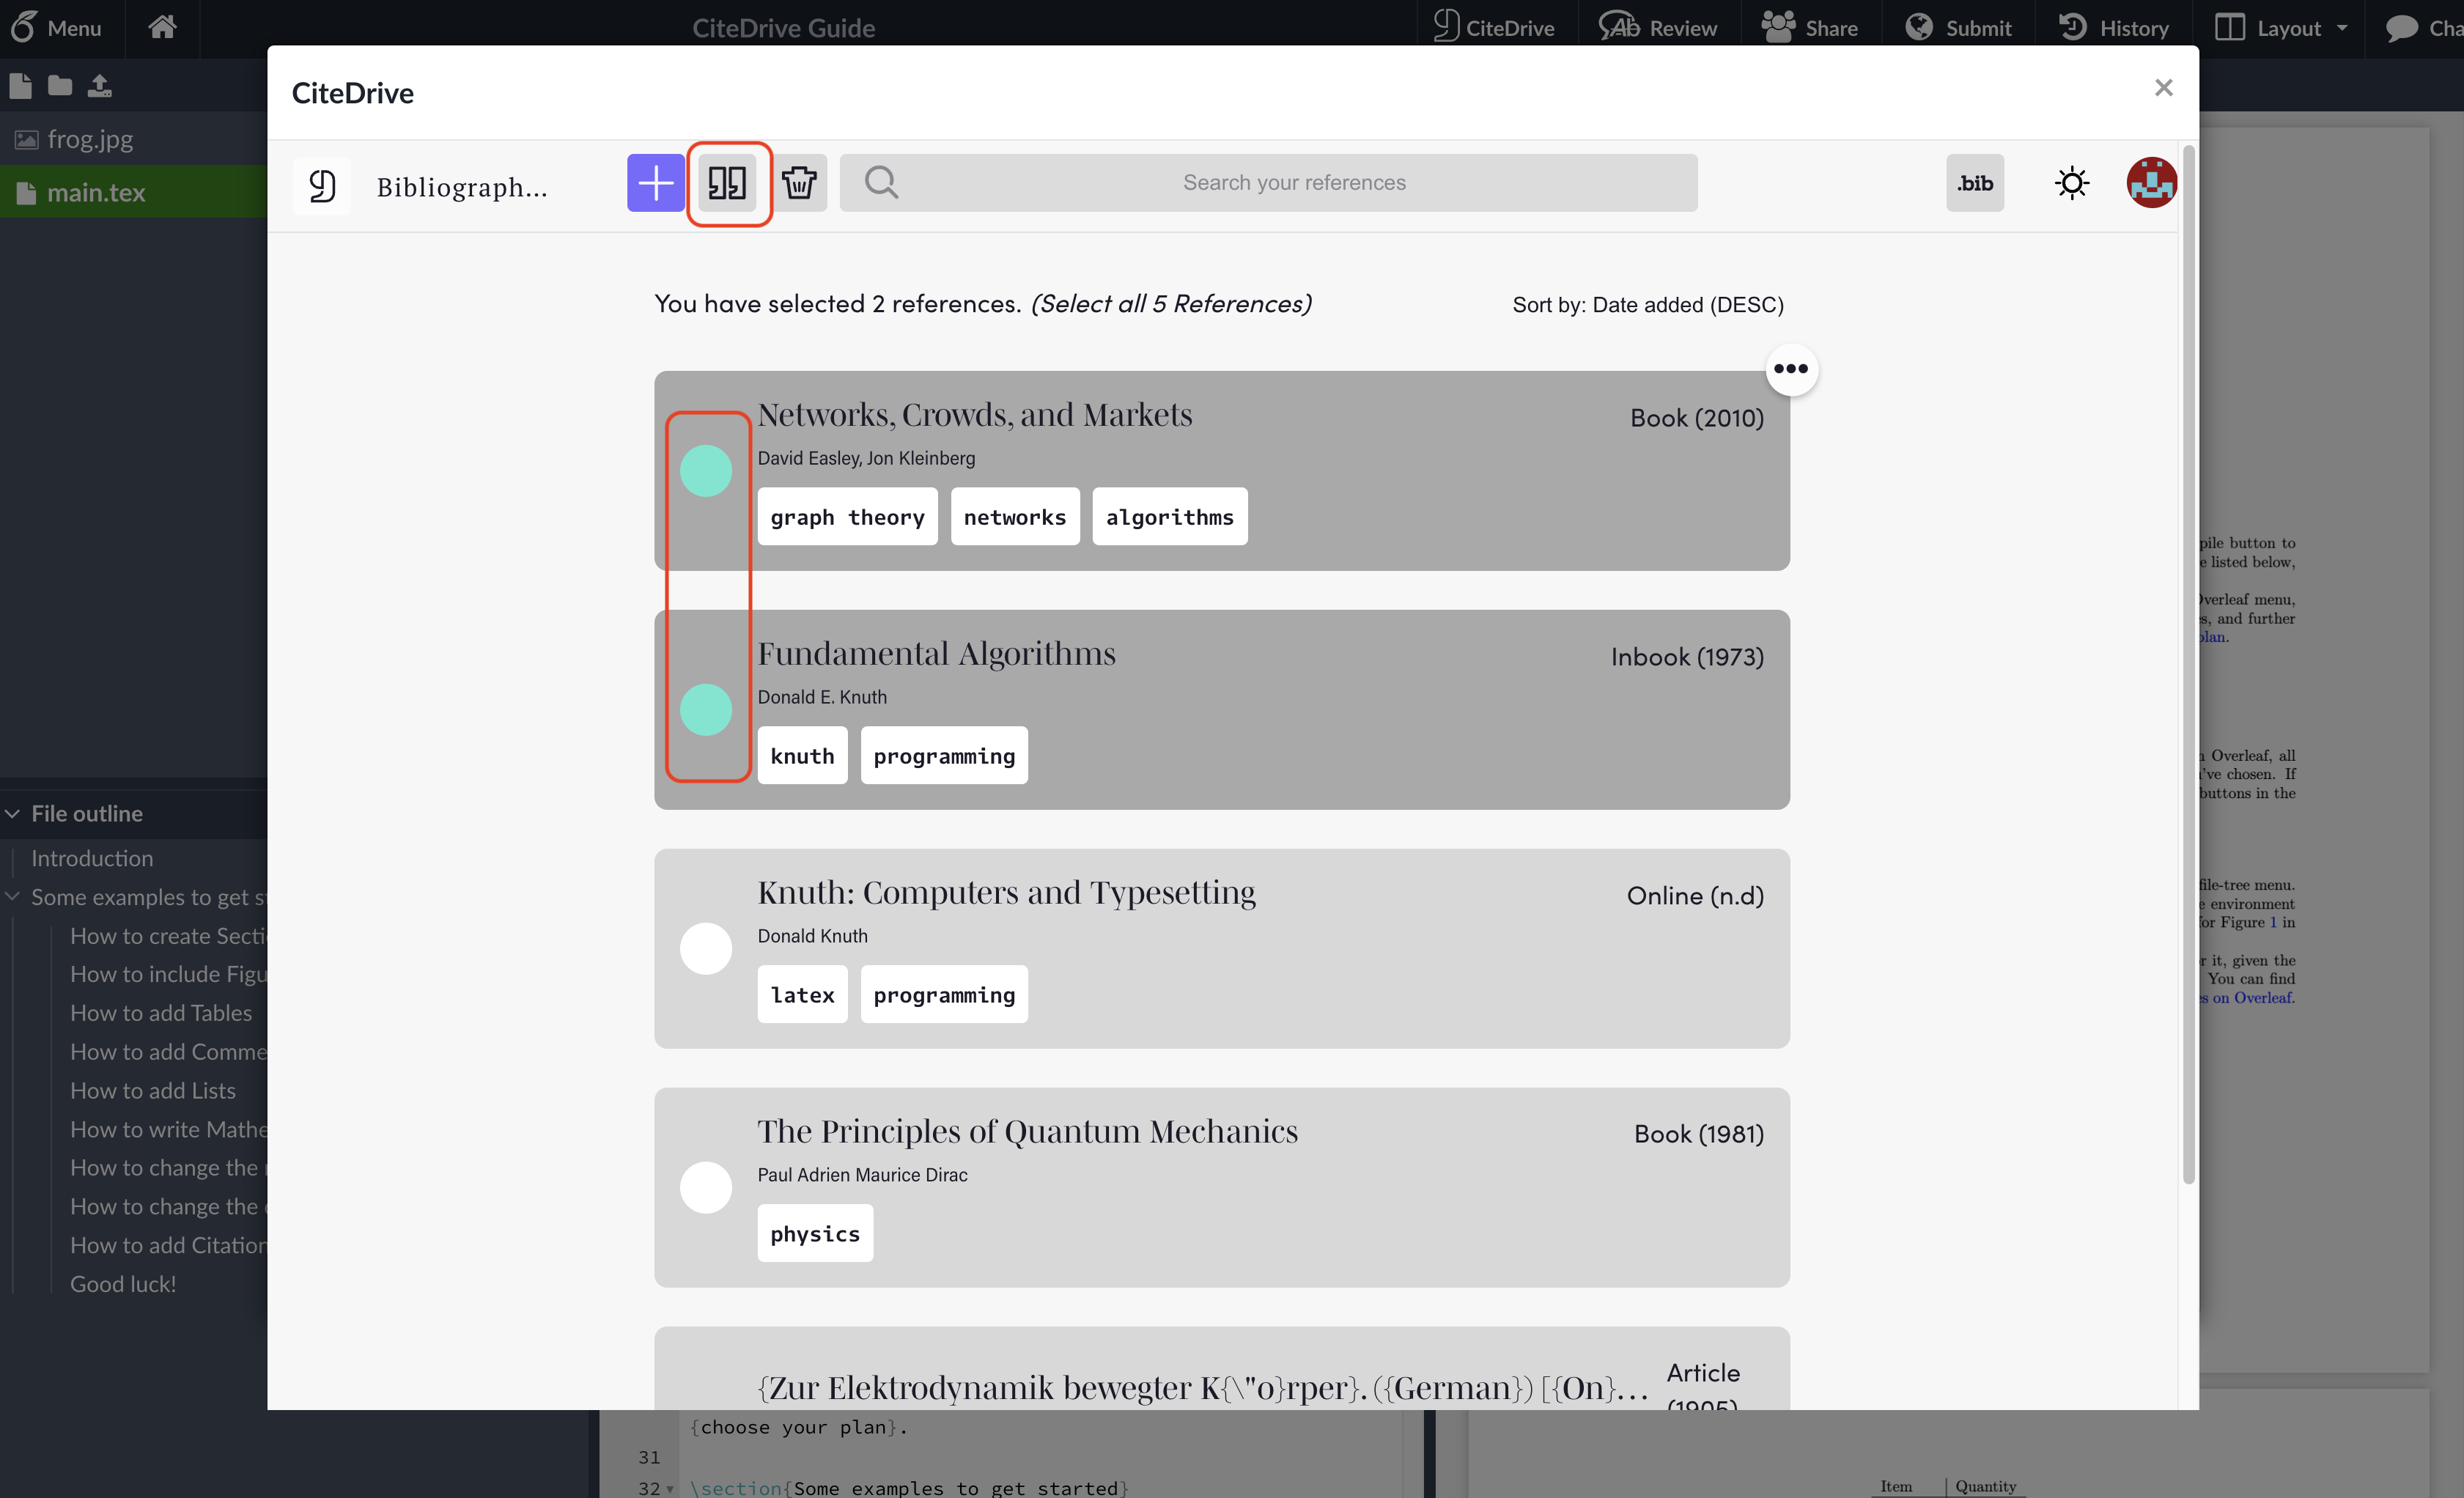
Close the pop-up window to return to your Overleaf project, and you’ll notice that the generated citation key has been inserted in the appropriate place:
\section{Main}Recent studies suggest that [...] and much more \cite{easley2010networks, knuth1973fundamental}.Repeat for your other reference and click the Recompile button in Overleaf to see the end result:
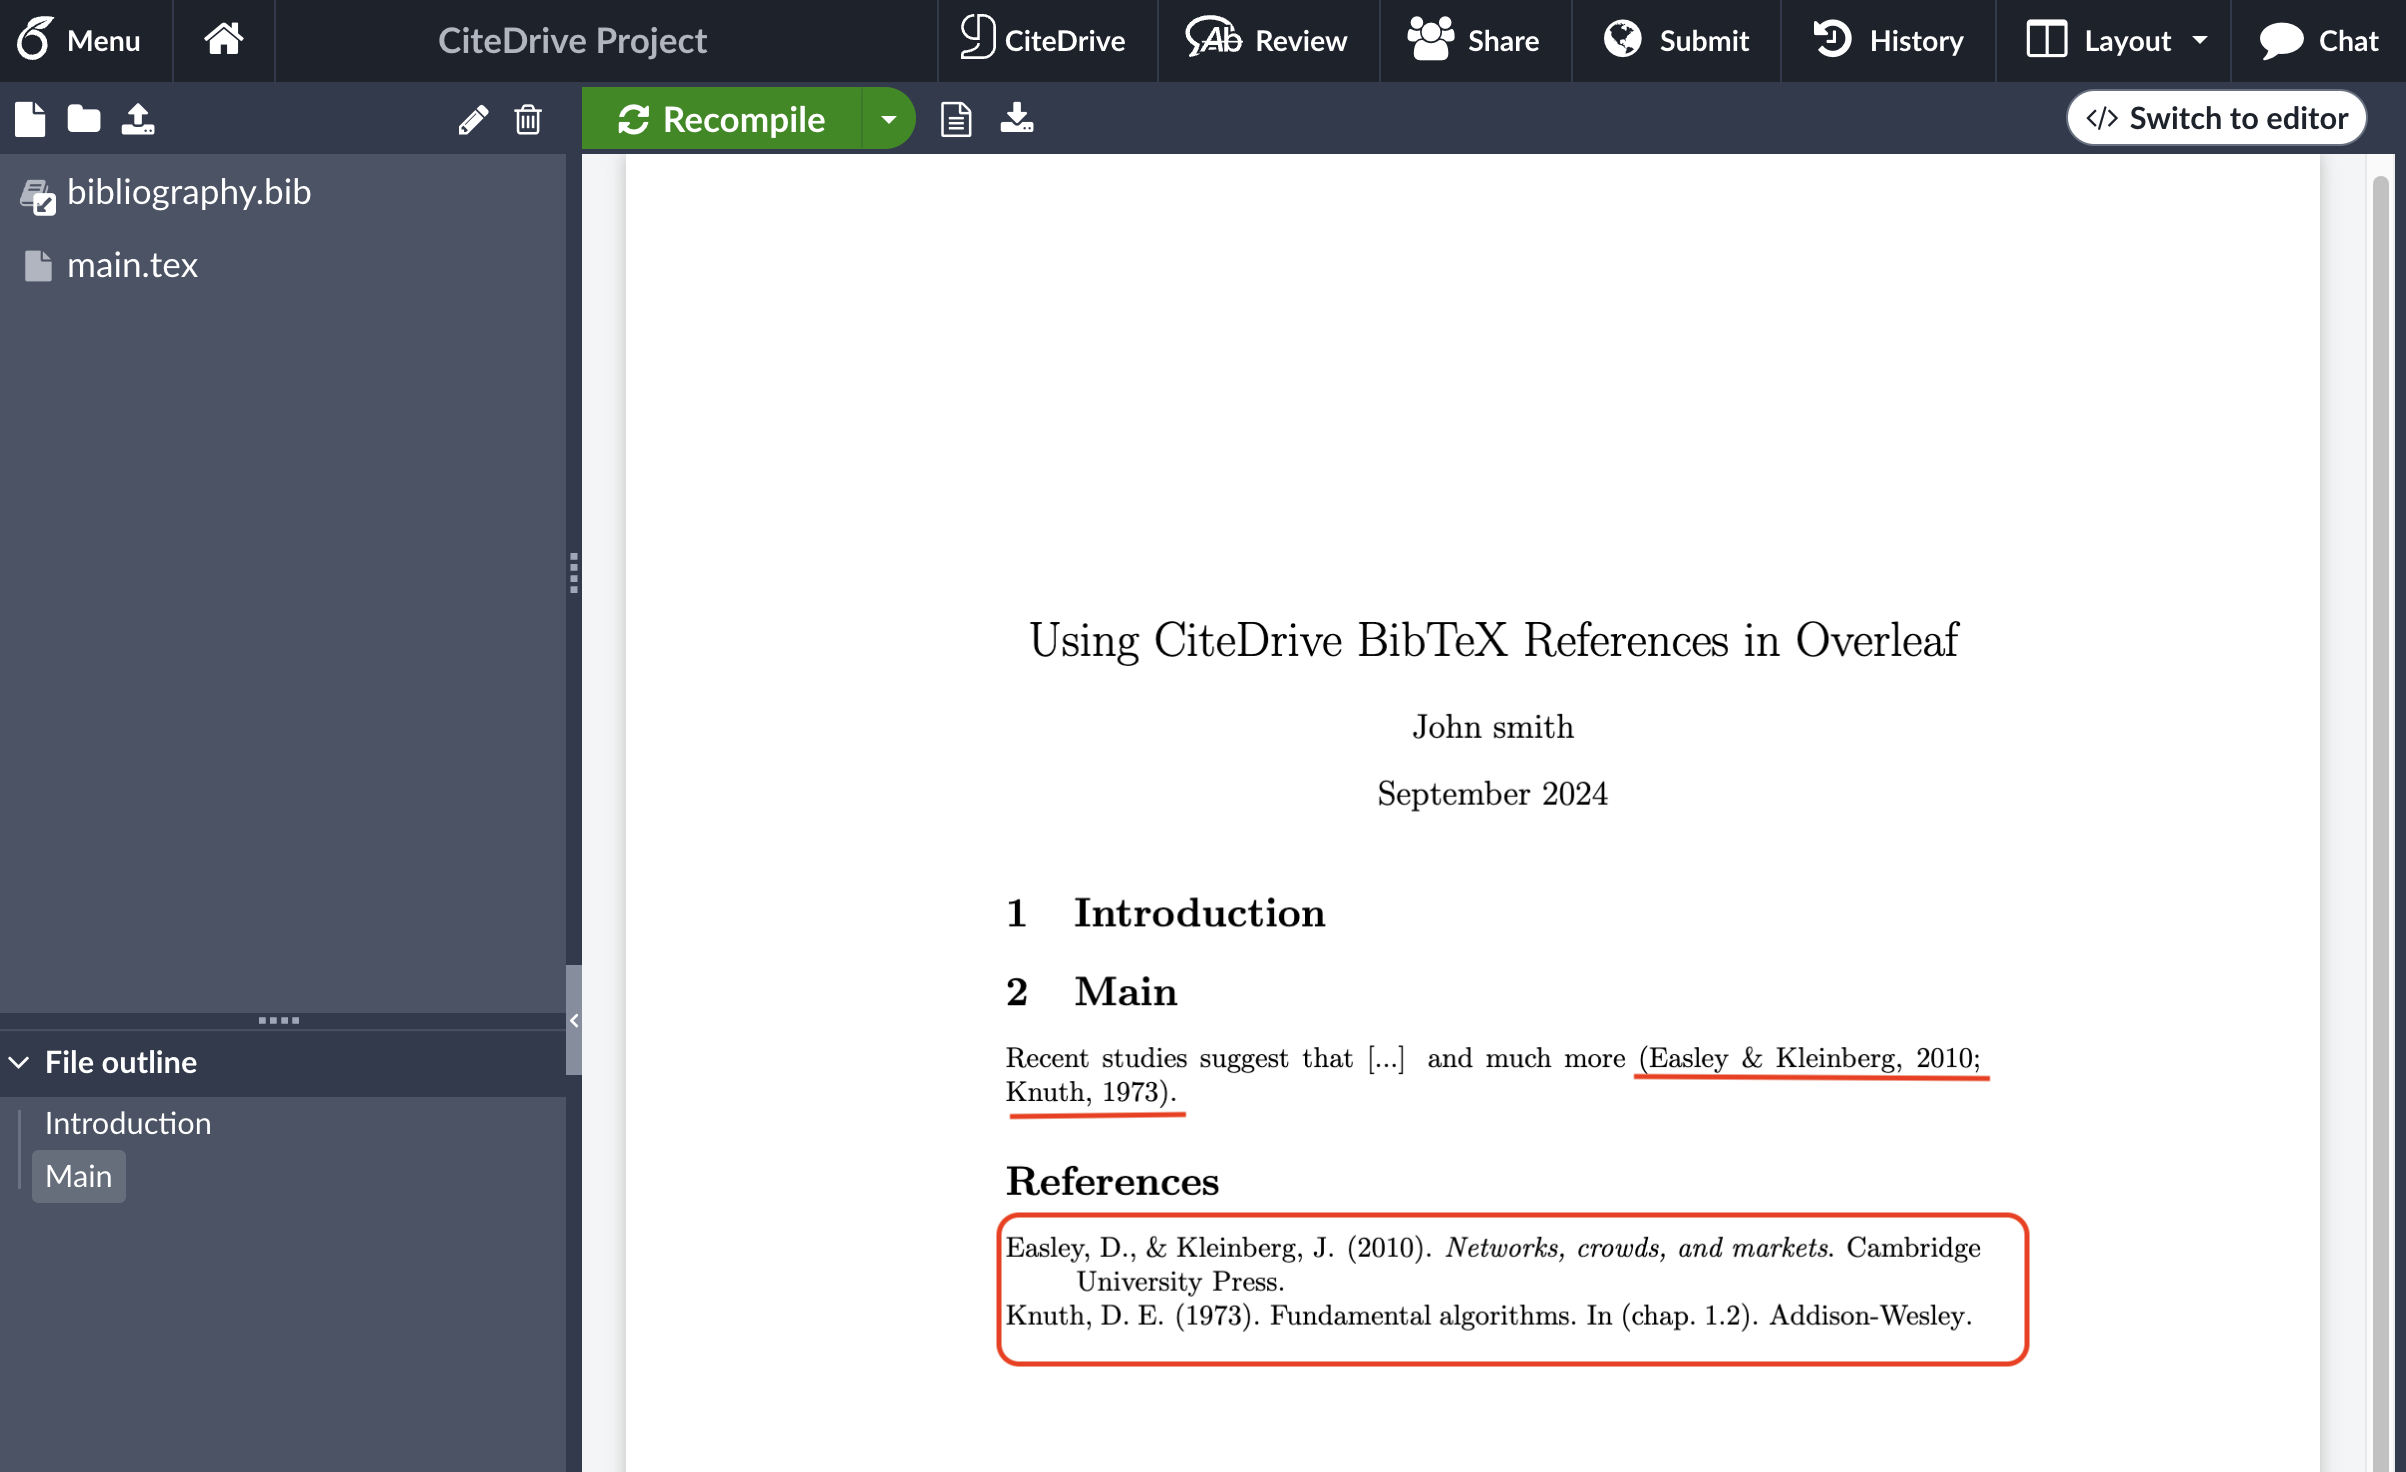
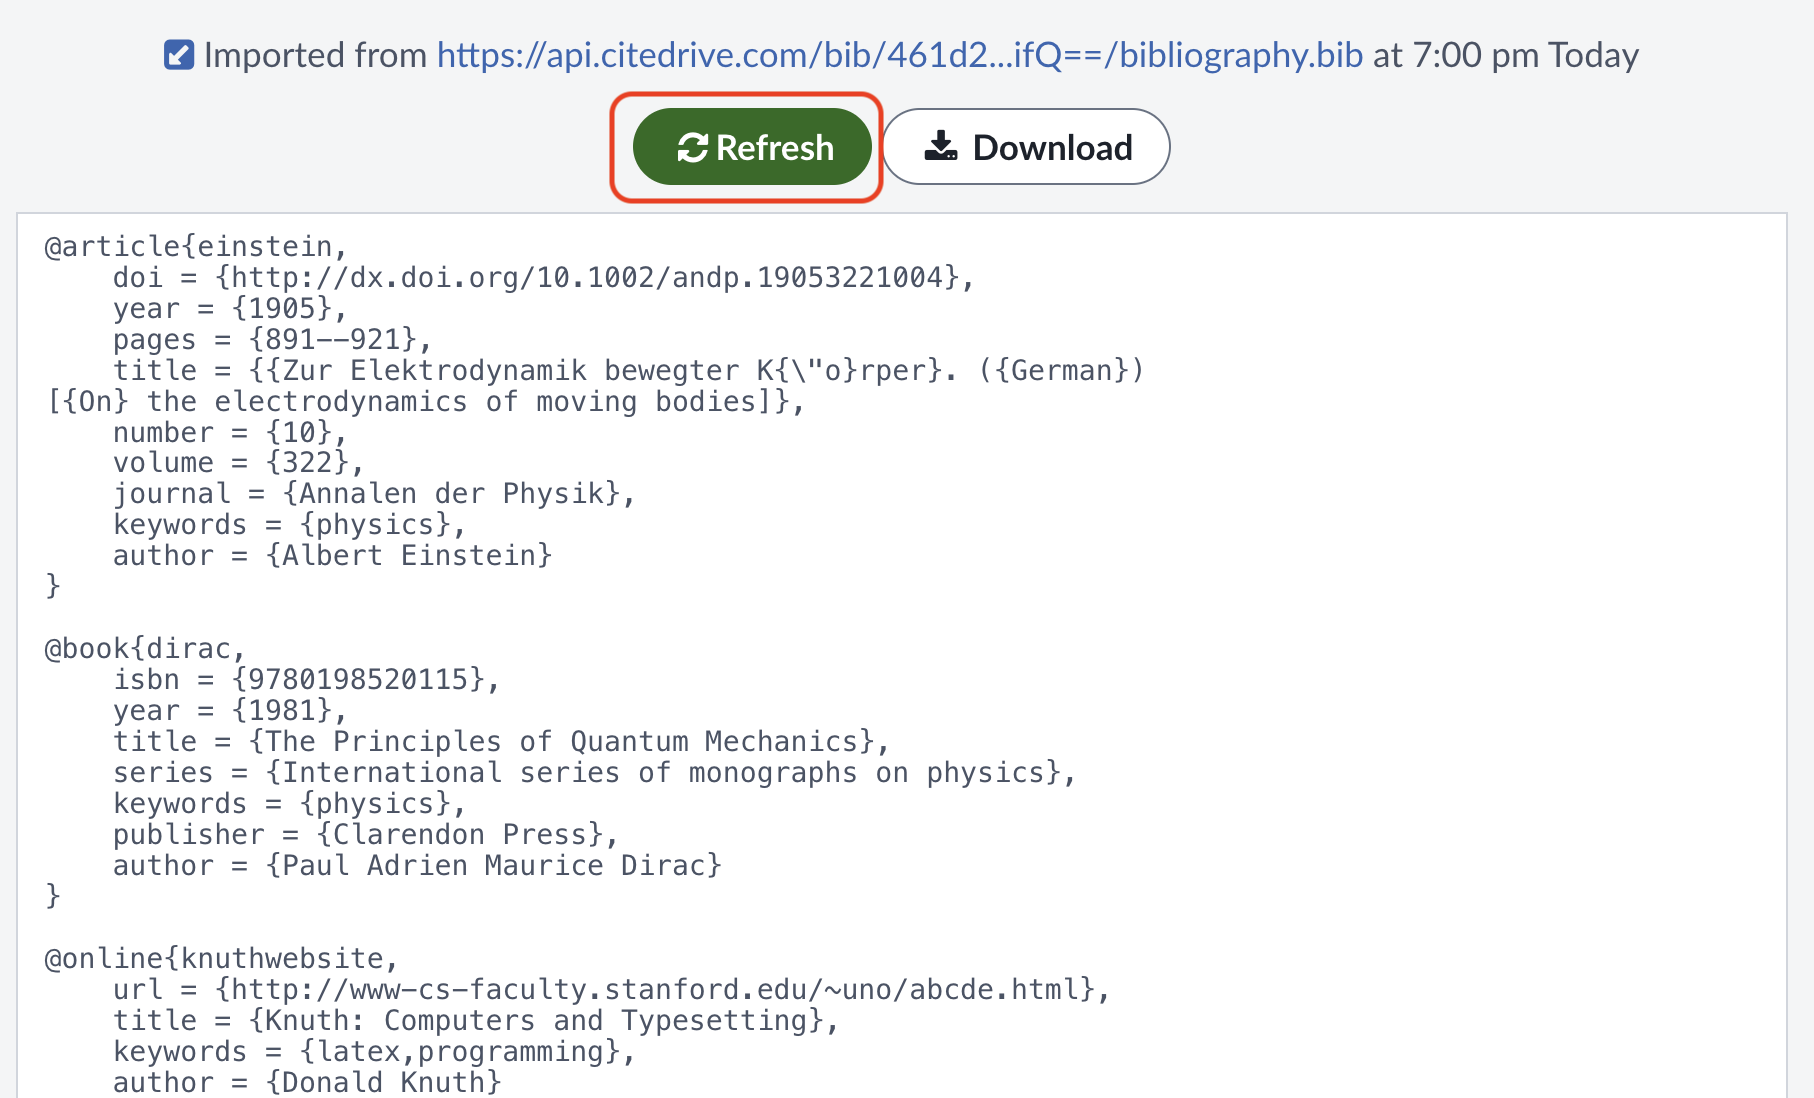
That’s it for this quick guide! If you want to learn more, as CiteDrive has many additional features, use the sidebar on the left as a reference. And don’t forget to refresh your bibliography whenever you add new references or make any changes to your CiteDrive project:
